环境准备
系统环境:使用 CentOS-7-x86_64-Minimal 最小化安装;
MariaDB 安装
MariaDB 是 MySQL 的一个分支,主要由开源社区在维护,采用 GPL 授权许可。MariaDB 的目的是完全兼容MySQL,包括 API 和命令行,使之能轻松成为 MySQL 的代替品。MariaDB(MySQL)是一种典型的 SQL(Structured Query Language)数据库,关系型数据库。
- 数据库安装
yum -y install mariadb mariadb-server  # 安装
systemctl start mariadb  # 启动
systemctl enable mariadb  # 开机自启
- 初始化数据库
[root@s11 ~]# mysql_secure_installation

Enter current password for root (enter for none):    <<< 初次运行,直接回车,设置 root 密码
OK, successfully used password, moving on...

Set root password? [Y/n] Y    <<< 是否设置 root 密码
New password:
Re-enter new password:
Password updated successfully!
Reloading privilege tables..
 ... Success!

Remove anonymous users? [Y/n] Y    <<< 删除匿名用户
 ... Success!

Disallow root login remotely? [Y/n] Y    <<< 禁止 root 远程登陆
 ... Success!

Remove test database and access to it? [Y/n] Y    <<< 删除 test 数据库
 - Dropping test database...
 ... Success!
 - Removing privileges on test database...
 ... Success!

Reload privilege tables now? [Y/n] Y    <<< 重新加载权限表
 ... Success!
登陆测试:
[root@s11 ~]# mysql -u root -p创建数据库用户,并授权
MariaDB [(none)]> create user 'cisco'@'%' identified by 'cisco';
MariaDB [(none)]> GRANT ALL PRIVILEGES ON *.* TO 'cisco'@'%' WITH GRANT OPTION;
MariaDB [(none)]> FLUSH PRIVILEGES;
MariaDB [(none)]> select User,Host from mysql.user;    <<< 查看用户表
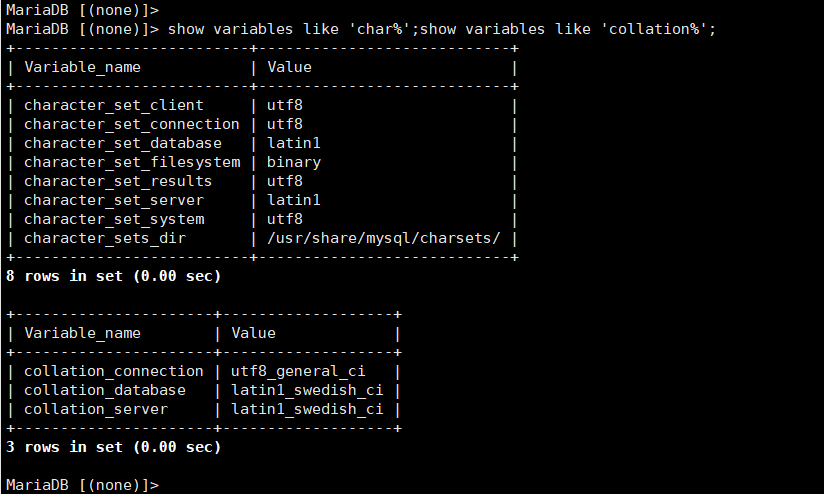
检查字符集
MariaDB [(none)]> show variables like 'char%';
MariaDB [(none)]> show variables like 'collation%';
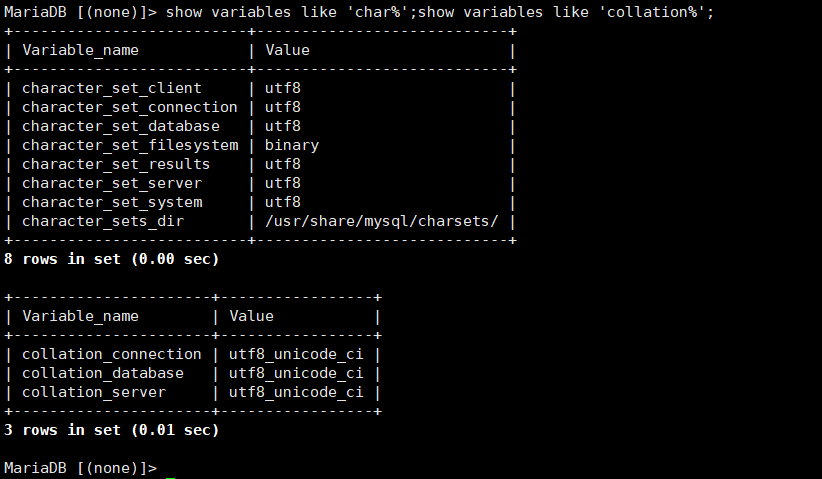
设置字符集
[root@s11 ~]# vim /etc/my.cnf
''' [mysqld] 标签下添加如下内容 '''
init_connect='SET collation_connection = utf8_unicode_ci'
init_connect='SET NAMES utf8'
character-set-server=utf8
collation-server=utf8_unicode_ci
skip-character-set-client-handshake
[root@s11 ~]#
[root@s11 ~]# vim /etc/my.cnf.d/client.cnf
''' [client] 标签下添加如下内容 '''
default-character-set=utf8
[root@s11 ~]#
[root@s11 ~]# vim /etc/my.cnf.d/mysql-clients.cnf
''' [mysql] 标签下添加如下内容 '''
default-character-set=utf8
[root@s11 ~]#
[root@s11 ~]# systemctl restart mariadb    <<< 重启数据库
[root@s11 ~]#
- 允许远程访问:将 host 字段改为 "%"
update mysql.user set host='%' where host='localhost';    <<< 不建议设置 root 用户远程登陆
select User,Host from mysql.user;
更改用户密码
MariaDB [(none)]> UPDATE mysql.user SET password=password('newpassword') WHERE user='root';
MariaDB [(none)]> flush privileges;
''' 推荐下面这种 '''
MariaDB [(none)]> SET password for 'root'@'localhost'=password('newpassword');
MongoDB 安装
MongoDB 是一种 NoSQL(Not Only SQL),NoSQL 泛指非关系型数据库。一般来说,SQL 数据库具有特定(固定)的表结构,需要预先设定好表结构和所有的字段的属性;而非关系型数据库(NoSQL)更加灵活,具有动态的表结构,可以在使用的过程中动态添加字段。NoSQL 更具水平(结构)扩展性,更适合超大型或者经常变化的数据集。
SQL 语句字符串拼接难度较大,而 NoSQL 可以直接把 JSON 数据写入数据库,降低了编程难度。
官方安装指南 https://docs.mongodb.com/manual/installation/
官方repo库 https://repo.mongodb.org/yum/redhat/7/mongodb-org/
数据库安装
[root@s11 ~]# vim /etc/yum.repos.d/mongodb-org-4.0.repo
''' 官方提供的4.0版本的repo文件内容如下: '''
[mongodb-org-4.0]
name=MongoDB Repository
baseurl=https://repo.mongodb.org/yum/redhat/$releasever/mongodb-org/4.0/x86_64/
gpgcheck=1
enabled=1
gpgkey=https://www.mongodb.org/static/pgp/server-4.0.asc
[root@s11 ~]#
[root@s11 ~]# yum install -y mongodb-org
[root@s11 ~]#
[root@s11 ~]# systemctl start mongod
[root@s11 ~]# systemctl enable mongod
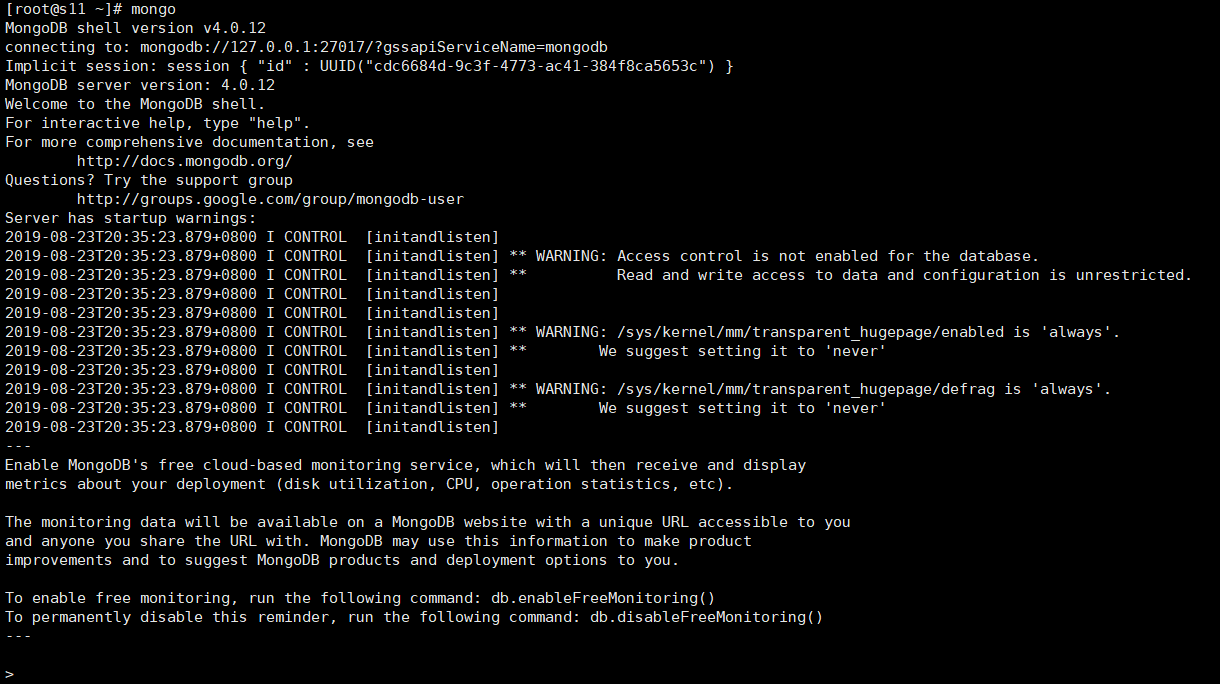
[root@s11 ~]# mongo    <<< 进入交互式界面
解决报错

''' 后两个告警,为 linux 透明大页功能引起,MongoDB 建议禁用 '''
[root@s11 ~]#
[root@s11 ~]# cat /sys/kernel/mm/transparent_hugepage/enabled
[always] madvise never
[root@s11 ~]# cat /sys/kernel/mm/transparent_hugepage/defrag
[always] madvise never
[root@s11 ~]#
[root@s11 ~]# echo 'never' > /sys/kernel/mm/transparent_hugepage/enabled
[root@s11 ~]# echo 'never' > /sys/kernel/mm/transparent_hugepage/defrag
[root@s11 ~]# systemctl restart mongod
''' 解决第一个访问控制相关的告警 '''
[root@s11 ~]# vim /etc/mongod.conf
    ''' 在 security: 部分激活授权 '''
security:
  authorization: enabled
    ''' 顺便修改侦听地址为 0.0.0.0 '''
net:
  port: 27017
  bindIp: 0.0.0.0  # Enter 0.0.0.0,:: to bind to all IPv4 and IPv6 addresses or, alternatively, use the net.bindIpAll setting.
[root@s11 ~]#
[root@s11 ~]# systemctl restart mongod
- 初始化数据库,并创建管理员用户

use admin
db.createUser({user:"cisco",pwd:"cisco",roles:["root"]})
db.auth('cisco','cisco')    <<< 用户认证
show dbs    <<< 查询所有数据库名称
- 创建新库,并创建该库的管理员用户

use ecsn
db.createUser({user:"ecsnadmin", pwd:"ecsn@123", roles:[{role:"dbOwner", db:"ecsn"}]})
- 测试写入数据库

use ecsn
db.auth('ecsnadmin','ecsn@123')
db.test.insert({'ceshi':123})    <<< 测试写入,test 为表名称
db.test.find()    <<< 表查询,括号里为查询条件
show tables    <<< 查询库中的所有表名称
PostgreSQL 安装
PSQL 不仅是一个关系型数据库,同时支持非关系特性,而且新版本逐步增加了对非关系特性的支持。PSQL 支持两种json数据类型:json和jsonb,两者唯一的区别在于效率,这里不做讨论。
数据库安装
[root@s11 ~]# yum install postgresql*初始化数据库
[root@s11 ~]# systemctl restart postgresql
[root@s11 ~]# systemctl enable postgresql
''' 进入交互式界面的方法见下图 '''
''' 常用交互命令 '''
postgres=# \du    <<< 查看角色
postgres=# \l    <<< 查看所有数据库
postgres=# \q    <<< 退出
创建数据库用户,与数据库实例
-bash-4.2$ createuser cisco
-bash-4.2$ createdb -e -O cisco ecsn.db
CREATE DATABASE "ecsn.db" OWNER cisco;
-bash-4.2$
''' 在超级用户 postgres 的交互界面为新用户设置密码 '''
postgres=# \password cisco
Enter new password:
Enter it again:
postgres=#
允许远程登陆
[root@s11 ~]# vim /var/lib/pgsql/data/postgresql.conf
''' 修改侦听地址 '''
listen_addresses = '*'    <<< 默认是 localhost
[root@s11 ~]# vim /var/lib/pgsql/data/pg_hba.conf
''' 设置允许远程连接 '''
[root@s11 ~]# systemctl restart postgresql    <<< 设置完成后需要重启服务
'''  防火墙放行策略 '''
[root@s11 ~]# firewall-cmd --permanent --add-service=postgresql
success
[root@s11 ~]# firewall-cmd --reload
success
[root@s11 ~]#
''' 在远程主机上测试登陆 '''
[root@C100 ~]# psql -U cisco -d ecsn.db -h 172.16.80.11    <<< 客户端需要安装命令行工具 yum install postgresql
2018年01月26日,整理 MariaDB 部分
2019年08月23日,整理 MongoDB 部分
2019年08月24日,整理 PostgreSQL 部分
本文由 SHIYL 创作,采用 知识共享署名4.0 国际许可协议进行许可
本站文章除注明转载/出处外,均为本站原创或翻译,转载前请务必署名
最后编辑时间为: Aug 24, 2019 at 02:28 pm
